Integrate Form Recognizer
In this section, we're going to be updating an Azure Function to call Form Recognizer to extract the patient's information from the uploaded image.
Updating the Azure Function
Switch back to VS Code, you should still have the contoso_new_patient_app open in VS Code.
Open the UploadFile.cs file, located at src/api/NewPatient/UploadFile.cs.
Scroll down to the // TODO: Call Azure Form Recognizer section.
Replace the // TODO comment and throw statement with the following code
string? endpoint = Environment.GetEnvironmentVariable("FORM_RECOGNIZER_ENDPOINT");
string? apiKey = Environment.GetEnvironmentVariable("FORM_RECOGNIZER_API_KEY");
string? modelId = Environment.GetEnvironmentVariable("FORM_RECOGNIZER_MODEL_ID");

if (string.IsNullOrEmpty(endpoint) || string.IsNullOrEmpty(apiKey) || string.IsNullOrEmpty(modelId))
{
    throw new InvalidOperationException("Missing environment variables");
}

var credential = new AzureKeyCredential(apiKey);
var client = new DocumentAnalysisClient(new Uri(endpoint), credential);

var blobClient = containerClient.GetBlobClient(filename);
var uri = blobClient.GenerateSasUri(BlobSasPermissions.Read, DateTimeOffset.UtcNow.AddMinutes(5));

AnalyzeDocumentOperation operation = await client.AnalyzeDocumentFromUriAsync(WaitUntil.Completed, modelId, uri);
AnalyzeResult result = operation.Value;

var outputs = new Dictionary<string, (string, float?)>();

foreach (AnalyzedDocument document in result.Documents)
{
    foreach ((string fieldName, DocumentField field) in document.Fields)
    {
        outputs.Add(fieldName, (field.Content, field.Confidence));
    }
}

return outputs;
You must Save the file.
What is this code doing?
Let's take some time to understand what this code is doing by breaking it down piece by piece.
string? endpoint = Environment.GetEnvironmentVariable("FORM_RECOGNIZER_ENDPOINT");
string? apiKey = Environment.GetEnvironmentVariable("FORM_RECOGNIZER_API_KEY");
string? modelId = Environment.GetEnvironmentVariable("FORM_RECOGNIZER_MODEL_ID");

if (string.IsNullOrEmpty(endpoint) || string.IsNullOrEmpty(apiKey) || string.IsNullOrEmpty(modelId))
{
    throw new InvalidOperationException("Missing environment variables");
}
This first piece of code is retrieving the environment variables that contain the keys and other secret information for Form Recognizer, avoiding us from hard-coding them into the code. We've also got some null checking, to ensure that we have set the values.
var credential = new AzureKeyCredential(apiKey);
var client = new DocumentAnalysisClient(new Uri(endpoint), credential);
Here, we're creating the connection to Form Recognizer using the endpoint and API key.
var blobClient = containerClient.GetBlobClient(filename);
var uri = blobClient.GenerateSasUri(BlobSasPermissions.Read, DateTimeOffset.UtcNow.AddMinutes(5));
Form Recognizer will need a URL to the image that we want to analyze, so we're creating a SAS token for the image that we uploaded to Azure Storage, which will mean that only the Form Recognizer service can access the image.
AnalyzeDocumentOperation operation = await client.AnalyzeDocumentFromUriAsync(WaitUntil.Completed, modelId, uri);
AnalyzeResult result = operation.Value;

var outputs = new Dictionary<string, (string, float?)>();

foreach (AnalyzedDocument document in result.Documents)
{
    foreach ((string fieldName, DocumentField field) in document.Fields)
    {
        outputs.Add(fieldName, (field.Content, field.Confidence));
    }
}

return outputs;
Lastly, we'll call Form Recognizer, telling it which image we want to analyze and what trained model to use for that. When the result comes back, we'll loop through the fields that were found and return them as a dictionary, which will later be stored in Cosmos DB.
Optional. Run the patient Static Web App locally.
Running Locally
To run the application locally, we need to set the environment variables for the Azure Function in the local.settings.json file.
Create a new file (if one doesn't already exist) at src/api/local.settings.json and include the following code:
{
    "IsEncrypted": false,
    "Values": {
      "AzureWebJobsSecretStorageType": "files",
      "FUNCTIONS_WORKER_RUNTIME": "dotnet",
      "COSMOS_DB": "REPLACE_WITH_COSMOS_DB_CONNECTION_STRING",
      "FORM_RECOGNIZER_API_KEY": "REPLACE_WITH_FORM_RECOGNIZER_API_KEY",
      "FORM_RECOGNIZER_ENDPOINT": "REPLACE_WITH_FORM_RECOGNIZER_ENDPOINT",
      "NEW_PATIENT_STORAGE": "REPLACE_WITH_STORAGE_CONNECTION_STRING",
      "FORM_RECOGNIZER_MODEL_ID": "patient-registration-model"
    },
    "Host": {
      "CORS": "*"
    }
}
List the Azure service keys
You will need the Azure service keys to configure the patient registration app. So, from the terminal window, run the following commands to list the Azure service keys.
Run the following command to list Azure service keys.
azd env get-values
Update the local.settings.json file
Replace the placeholders with the values from the azd env get-values command.
Once all the environment variables have been set, you can run the application locally.
Run the application locally
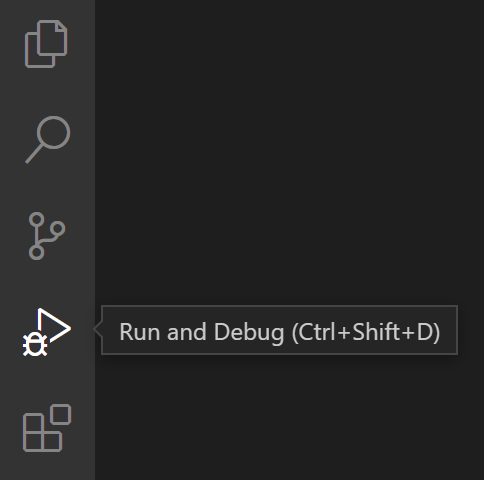
Open the Run and Debug view from the VS Code sidebar, or select Ctrl+Shift+D or Cmd+Shift+D on macOS.

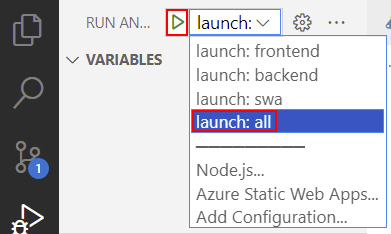
From the drop down, select launch: all, then select the Start Debugging button.
 info
infoDepending on how fast your computer is, it may take up to 30 seconds for the Static Web App to start.
Once all the debuggers have started, navigate to http://localhost:4280 in your web browser.
Test the Application
Drag and drop one of the training images from the
contoso_new_patient_assets/training_labeled/<language>folder into the drop zone. Be sure to use an image from the folder that matches the language you used to train the Form Recognizer model.Next, select Upload.
Once the image has been uploaded, and after a few seconds, you'll see the fields that were extracted from the form.
Select Save to save the data to Patient Registration Cosmos DB.
Deploy to Azure
Deploy the app to Azure Static Web Apps with the Azure Developer CLI.
From VS Code, select Ctrl+Shift+` to open a new terminal.
From the terminal, run the following command to start the function app. This command takes about one minute to deploy the updated function to Azure.
azd deploy
Open the patient registration app in your browser
From your browser, open the patient registration app at the Web Service URL displayed in the deployment logs.

Save the patient registration app URL for use in the next section.